Spectroscopy is one of the most important tools in astronomy. Spectra can tell us how fast a distant object is travelling through space, the direction it is travelling, its chemical composition, its density and how hot it is. For ASTRO 3D astronomers, spectroscopy is used to analyse the light from distant stars to determine their elemental and molecular composition.
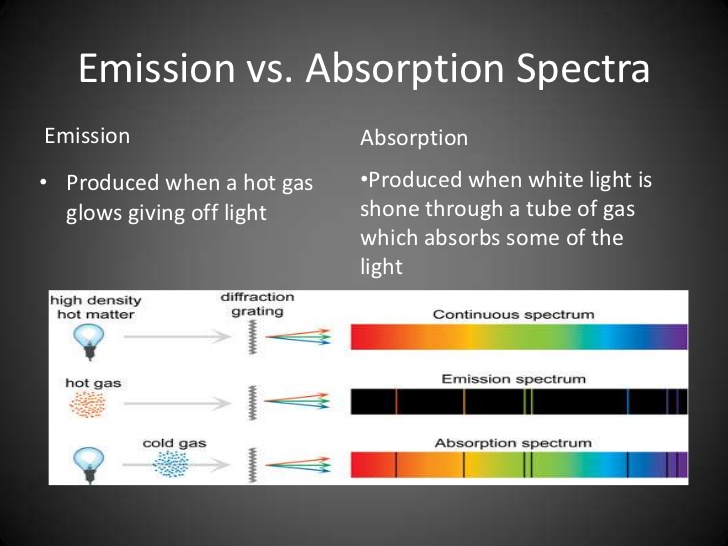 A spectroscope is an instrument that enables astronomers to view spectra. The spectroscope splits or disperses the light from an object into its component wavelengths so that it can be recorded then analysed. As the different wavelengths of light pass through the spectroscope, they undergo refraction (‘bending’ of light due to a change in velocity due to going from air to glass). Red light has a longer wavelength than blue light, so it gets bent less than blue light, which has a shorter wavelength. This difference in bending splits the light wavelengths up into a spectrum.
The different atoms of elements absorb or emit light at specific wavelengths, and that tells us the chemical composition of stars and galaxies.
Additionally, as light moves away or towards us, the spectral lines shift either to the red end of the spectrum (redshifting or light moving away from us) or blue end of the spectrum (blueshifting or light moving towards us). This enables us to understand motion of stars, galaxies and also expansion of the Universe.
Spectroscopy enables astrophysicists to collect 3D datacubes for every pixel of light that our telescopes collect, letting us understand a much wider range of properties than just a 2D snapshot. Discover how ASTRO 3D projects, the SAMI, HECTOR and GALAH galaxy surveys, are using multifibre spectroscopy to survey thousands of galaxies to determine their direction, how gas orbits their centres and their chemical composition.
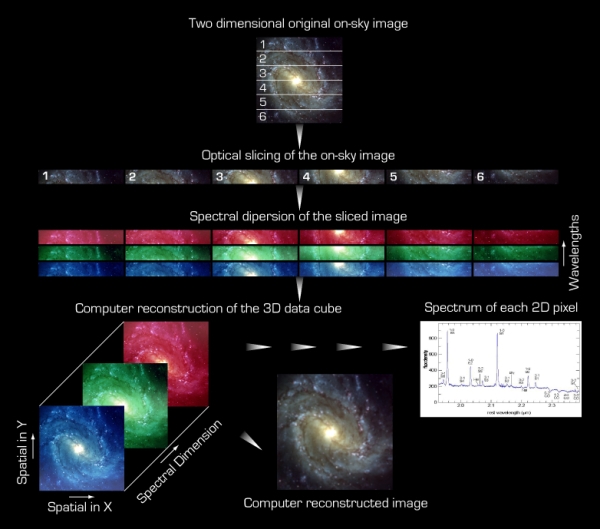
Credit – ESO
Building the spectroscope
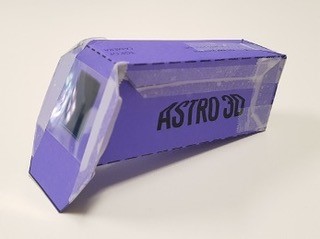
 You can easily build your own spectroscope with only a few materials:
- the A4 spectroscope template (see below),
- a pair of scissors,
- sticky tape, and
- a piece of diffraction grating.
The printing and assembly instructions are on the reverse side of the template.
You can also view the video that takes you through the construction of the spectroscope step-by-step.
USING THE SMARTPHONE SPECTROSCOPE
After you have built your spectroscope, you can attach the it to the camera on your smartphone (or tablet, laptop, webcam etc.) to record the spectra you see. All you need to do is place the diffraction grating surface directly on the camera lens and fix with sticky tape.
Using the Smartphone Spectroscope:
(Credit: Ron Bradbury, University of New England)
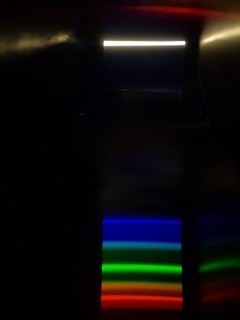
Switch on the device’s camera. Point the Spectroscope at a light source, a fluorescent light for example, and the spectrum should appear on the screen. Experiment with camera zoom and position of the Spectroscope to get the best picture. Of course, the images can be captured and stored in the device.
Warning: Never view the sun directly by eye, with or without the spectroscope.
Warning: Never view laser light directly by eye, with or without the spectroscope.
Light sources to view:
- Sun: The sun can be viewed with the Spectroscope attached to a smartphone but you may find that it is too bright for the smartphone. It is better to view a bright part of the sky instead or a reflection from a sheet of white paper. A continuous spectrum.
- Fluorescent lamp: 3-4 coloured bands that arise from the fluorescent material in the lamp
- Incandescent lamp: Continuous spectrum from “black body” filament radiation
- Spectral tubes: If you have access to emission spectra tubes you can view the spectra of different elements.
- LEDs: Apart from white LEDs (light-emitting diodes), LEDs are monochromatic and are seen as a single coloured band. Small “power on” indicator LEDs are too dull for this purpose but those used in vehicle tail lights, traffic lights and architectural lighting will be bright enough. Some toys have red, green and blue LEDs used in combination.
- Cool White LED: “Cool” is in the artistic sense; the light is bluish-white. Most white LEDs are actually purplish-blue-emitting with a yellow fluorescent material coating. The coating absorbs some of the light and re-emits yellow. The combination of purplish-blue and yellow light looks white . Spectrum has narrow blue and broad yellow emission.
- Warm White LED: Likewise, “warm” is in the artistic sense. Like cool white LEDs except that other fluorescent materials are added that emit orange and red producing a “warmer” light. Spectrum has narrow blue and broad yellow-to-red emission.
- Street lights: May be high-pressure sodium, fluorescent or warm white LED. High-pressure sodium lamps are pale yellow and have many coloured bands. The older type of amber-coloured sodium lamps are rarely seen now but, if found, will have a prominent yellow band.
- Computer Screen: Experiment with setting the computer screen to various colours and examine the resulting spectra. Light from the computer screen is only fractions of red, green and blue light in combination.
Exercise
Record as many known light sources as possible. Record street lamps and determine the lamp types from the spectrum.